

Meet the Designer
Sarah Whitney
 I have loved colors, shapes, and creating things since I was a little kid. After earning my computer graphics degree from the University of Missouri in 1988, I spent my professional career working in television designing both print and on-air graphics for local news stations. Sarah Whitney, The Designer at Sweet Clover Canyon. My grandmother had been a skilled quilter. In 1991, I took my first quilting class as a tribute to her, having no idea I would love it so! Today, I am happily married and now a stay-at-home mom and entrepreneur. By combining both passions, design and quilting, I am having the time of my life creating quilt patterns in my Sweet Clover Canyon design studio. Thank you for visiting my site.
What sets Sweet Clover Canyon patterns apart from the rest?
I love design and being creative. Using both sides of my brain, the creative right brain and the analytical left brain makes me, well, happy! I think this combo lends itself to quilt pattern design too. The geometric shapes that make up quilt blocks speak to me. Fabric color and pattern is probably the pinnacle of the process for me. I could literally spend all day in a quilt shop picking coordinating fabrics. The precise measurement and math of cutting instructions for the fabric, to make the most of each piece, I inherently enjoy and are important to me. Writing the technical “math” part of patterns is fun too.
In trying to follow instructions for putting, say, furniture together or even a recipe for that matter has often frustrated me. I’m “gold”, if you are familiar with those personality color tests, “gold” people are rule followers, list makers, they like routines and doing things in order. I am most comfortable when things are simply presented, when I am sure I’m doing the right thing in the right order. All is right with the world when I’m following a path or process that is consistent.
When I started Sweet Clover Canyon, my quilt pattern design studio, I vowed to create step by step quilt patterns that were correct, easy to read and easy to follow. I illustrate many of the techniques or steps, agreeing that a picture is worth a thousand words. Integrity is important, therefore, I hire professional pattern editors to edit each pattern, review and challenge my work. Independent quilters test patterns for accuracy and provide constructive feedback that is reviewed, considered and often incorporated in the final pattern. Two (or more) heads are better than one! Once these changes are made it goes back to the editor. A professional quilt photographer has shot most of the quilt cover art.
I love these two quotes and they are a part of my design belief:
“Perfection is achieved, not when there is nothing more to add, but when there is nothing left to take away.”
~Antoine de Saint-Exupery
“Don’t think about making art, just get it done. Let everyone else decide if it’s good or bad, whether they love it or hate it. While they are deciding, make even more art.”
~Andy Warhol
Not only do my patterns have multiple checkpoints, I also include many bonuses. I include these “extras” to support the quilter, shop owner, quilting class teacher or guild to ensure ease and accuracy in making each project.
I wanted a system that when I sewed at my dining room table I could easily stow it away during dinner and returned to the table organized and ready to go without skipping a beat. The system would aid quilt shops who were stitching samples, leaving the machine to help a customer and return to it, easily picking up where they left off. I’ve taught beginning quilting classes and this system a lifesaver to quilting teachers and their students. My “baggie” system that is incorporated as part of the letters and labels system is the winner winner chicken dinner of portability.
Letters & Labels System ©:
Each pattern lists it’s fabric requirements on the back cover. It includes the color and yardage needed. The “letters” are assigned to the corresponding fabric or to say it another way, to the fabric it represents. The letters are cut out and taped to the corresponding fabric.
The “labels” are cut apart and taped to individual sandwich or quart sized zip lock baggies. The cutting directions start with the “A” fabric. As each piece is cut, the directions have you place it with its label, kind of like dealing a deck of cards. (This may seem a little confusing but I promise once you get the hang of it you will LOVE it! In the end it save SO much time!). Once all of the fabrics are cut, they are placed inside their labeled baggie.
Swatch Chart:
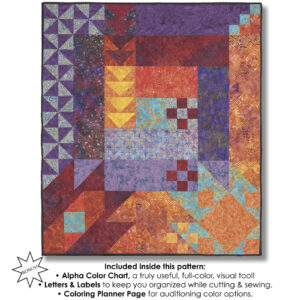
Once the letters have been assigned, cut a bit of each fabric and adhere it to the swatch chart. Hang it near your workspace. For projects with just a few fabrics this may not be necessary. However, I find it invaluable when I’m stitching a project with many fabrics. Marmalade & Jam uses 14 fabrics, for example, and the swatch chart is a quick visual reference to keep you on track.
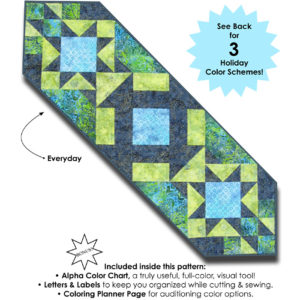
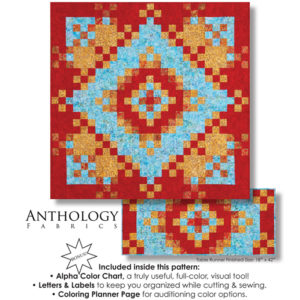
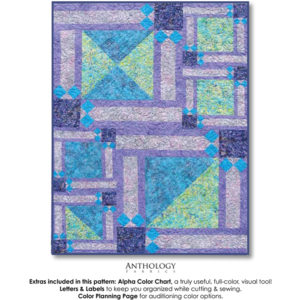
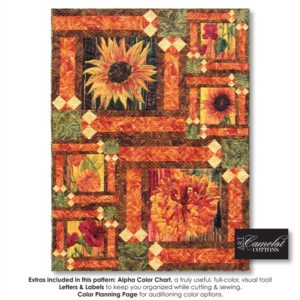
Alpha Color Chart ©:
This is MY favorite bonus! My pattern covers are designed as tri-folds. The Alpha Color Chart page is opened out, right next to the black and white written and illustrated instructions. It’s a great visual tool showing where each letter/fabric goes, right there next to you while you work.
Color Planning Page ©:
A line drawing of the project or quilt is included in each pattern. Some quilters like to use colored pencils or other medium to “audition” color options. Wendy, a very talented machine quilter, even used the line drawing to help me map out quilting ideas.
Pressing Instructions:
Pressing instructions have been added to most every sewing step. Knowing which way to press helps future piecing goes together, without the need to repress to the other side, and insures interlocking intersections.